A rainwater harvesting system collects rainfall from your roof through gutters and downspouts, storing it in tanks for garden irrigation. You’ll need gutters, pre-filters to remove debris, storage tanks, and distribution pipes—either gravity-fed or pump-powered depending on tank placement. This approach reduces your municipal water usage, builds drought resilience, and decreases stormwater pollution. By calculating your garden’s annual water demand (typically 10,000-50,000 gallons) and roof catchment capacity, you can size your system appropriately. Proper filtration, seasonal maintenance, and correct installation guarantee clean water and long-term performance.
Key Takeaways
- Rainwater harvesting systems capture rooftop runoff through gutters and downspouts, storing it in tanks for garden irrigation and reuse.
- Core components include catchment areas, conveyance systems, pre-filters, storage tanks, and distribution pumps that work together to collect and deliver water.
- First flush diverters and filtration remove debris and contaminants, ensuring collected water remains clean and safe for gardening purposes.
- System sizing depends on roof catchment capacity, garden water demand, and storage tank volume to balance supply during dry periods.
- Seasonal maintenance—including gutter cleaning, filter inspection, leak checks, and winterization—extends system lifespan and guarantees reliable water quality year-round.
What Rainwater Harvesting Systems Do (and Why You Need One)
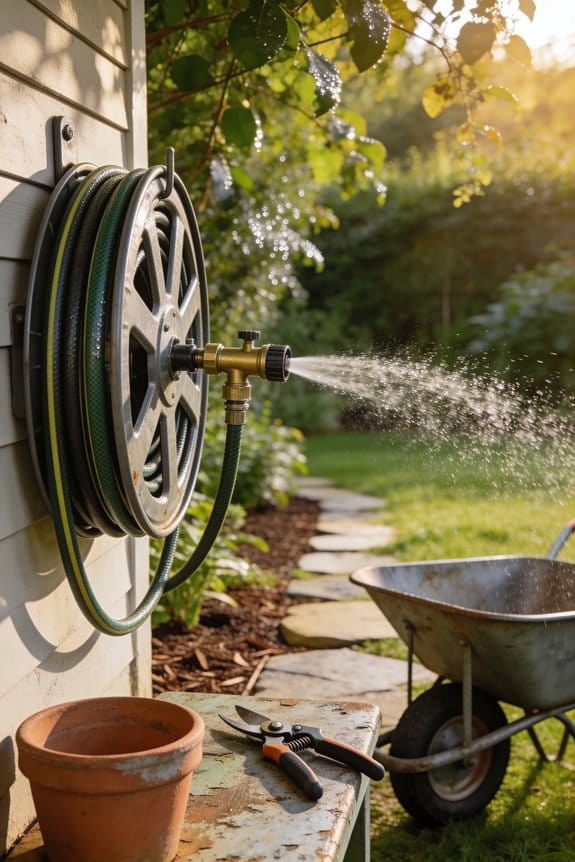
If you’ve ever watched rainwater rush off your roof during a storm, you’re witnessing a resource that most homeowners let go to waste. Rainwater harvesting systems capture this runoff and store it for later use, primarily for gardening and irrigation. By collecting rainwater, you’re reducing your dependence on municipal water supplies, which creates drought resilience during dry periods. These systems also provide ecosystem benefits by decreasing stormwater runoff that pollutes local waterways. A basic setup includes gutters, downspouts, filters, and storage tanks that work together to collect and clean the water. When you install a rainwater harvesting system, you’re making your garden more sustainable while conserving a precious natural resource that many regions increasingly struggle to maintain.
Rainwater Harvesting Components Explained

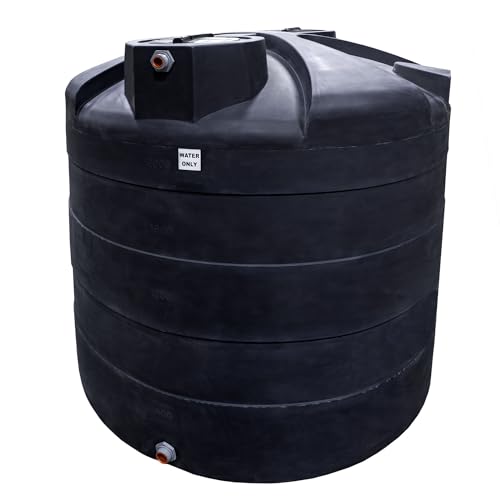
Now that you understand why rainwater harvesting systems matter for your garden, it’s important to break down the specific components that make these systems work. Your catchment area—typically a rooftop made from catchment materials like metal or asphalt shingles—collects initial rainfall. From there, gutters and downspouts form your conveyance system, directing water downward. Pre-filters with mesh screens remove debris before water reaches your storage tank. These tanks, available in various materials and sizes, store collected rainwater for later use. Distribution components like pumps and piping deliver water to your garden beds. Each piece serves a specific purpose, and together they create an efficient system. Understanding how these components function helps you design a setup that matches both your garden’s needs and your home’s system aesthetics.
Recommended Products
RELIABLE LONG-LASTING VERTICAL WATER STORAGE: The Elkhart Plastics 2500 Gallon Water Container is designed for a wide range of applications; Vertical tanks are versatile for bulk water, well water storage, rainwater collection, and fire suppression

VERSATILE LIQUID STORAGE: Ideal for storing potable water, agricultural solutions, or non-flammable industrial and chemical liquids.

Rain Barrels: Pack of 4 rain barrels that add style and beauty to your outdoor space while helping the environment by conserving water
How Filtration Keeps Your Water Clean

Because rainwater collects dust, debris, and contaminants as it flows across your roof and through gutters, you’ll need a multi-stage filtration process to guarantee your harvested water stays clean for gardening. First flush diverters automatically discard the initial dirty runoff, which contains the most contamination. Settlement tanks then remove silt and floating impurities through gravity separation. Filter beds and mesh screens at tank inlets catch finer particles, while strainer baskets block insects and leaves. Inside your storage tank, a floating pickup draws clean water from the top layer, avoiding sediment. For best results, consider bacterial testing periodically to verify your filtration system maintains water quality. This approach guarantees your garden receives safe, clean harvested rainwater.
Recommended Products

FIRST FLUSH PROTECTION: Protect the integrity of your rainwater by diverting initial runoff through the first flush diverter, equipped with the Catch-All Tee to ensure only the highest quality water is captured

Dimension - 11.6 x 9 x 5.7 in.

ELECTRONIC RELEASE VALVE: Precisely set how often you want to divert water so you can optimise the quality and quantity of water you catch in your tank
Calculating Your Water Needs and Tank Size

Sizing your rainwater tank correctly requires understanding two key factors: how much water your garden actually needs and how much rain your roof typically collects. I’d calculate your garden’s water demand by measuring your planting area and researching crop requirements, which vary seasonally with crop rotation practices. Next, I’d determine your roof’s catchment capacity by multiplying roof area by your region’s average annual rainfall. Tank size should balance supply and demand, accounting for dry periods. You might also consider greywater integration, which supplements rainwater with household water sources, reducing your reliance on harvested rainwater alone. A typical residential garden needs 10,000 to 50,000 gallons annually, so I’d size my tank accordingly to meet these demands during peak growing seasons.
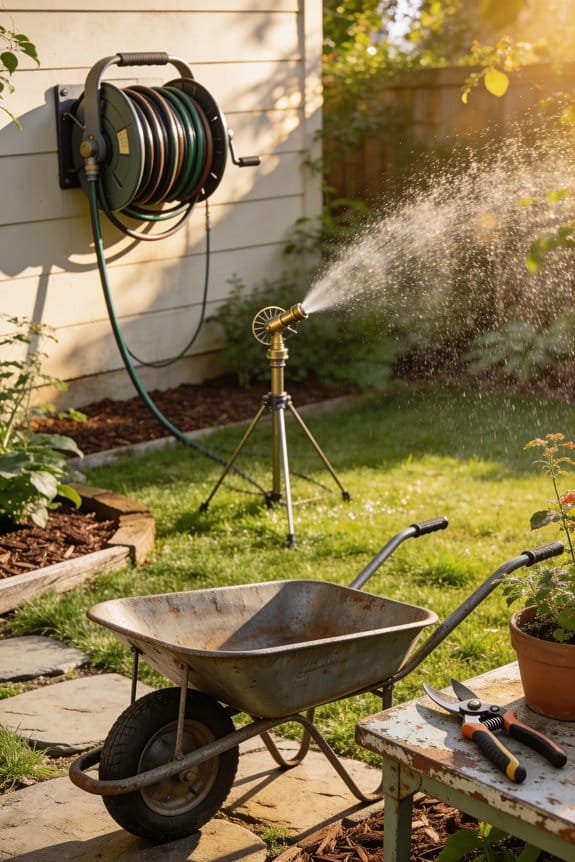
Rainwater Distribution: Gravity vs. Pumped Systems

Once you’ve sized your rainwater tank to match your garden’s needs, the next decision involves choosing how to move that water from storage to your plants, and this choice fundamentally depends on your tank’s elevation and your garden’s layout. Gravity distribution works when your tank sits elevated above garden beds, allowing water to flow downward through pipes without additional equipment. For ground-level or underground tanks, you’ll need pump selection to pressurize the system. Submersible pumps work well for below-ground storage, while surface pumps handle above-ground tanks. Three-way valves let you switch between rainwater and municipal supply automatically. Consider your garden’s size and distance from storage when deciding which system suits your setup best.
Recommended Products

E.Sybox is an integrated electronic water booster system for domestic and residential use

Versatile Storage: Weather-Resistant: The 16mm thick double-layer resin panels resist warping and cracking; Designed with sturdy thermoplastic synthetic resin, the outdoor storage shed resists UV light, fading, water, and corrosion, ensuring long-lasting use in different weather conditions

Where to Place Your Storage Tank
With your distribution method selected, the location you choose for your storage tank becomes your next important consideration, since placement affects everything from how easily water flows to your garden to how much space the system requires on your property. Above-ground tanks work best near your catchment area and garden, minimizing pipe length and pressure loss. Underground tanks require proximity to your home’s foundation for stability. Consider soil proximity when digging, since you’ll want firm ground that won’t shift or settle. Privacy screening matters too—tanks can be visually intrusive, so position yours behind structures or vegetation. Make certain accessibility for maintenance and cleaning, while keeping the tank away from direct sunlight to prevent algae growth.
Setting Up a Rainwater System: Step-by-Step
Building your rainwater harvesting system requires planning and careful attention to each component’s role in the overall process. Start with your tool checklist: you’ll need a drill, saw, measuring tape, and level for installation. Begin by ensuring proper gutter alignment on your roofline, as this directs water toward downspouts without leaks or standing water. Next, install your conveyance system by connecting gutters to downspouts that channel water toward your storage tank location. Install pre-filters and first flush diverters to remove debris before water enters storage. Finally, position your tank on level ground with adequate support, then connect distribution piping and pumps. Test the entire system with a garden hose before relying on rainfall, checking for leaks and proper water flow throughout.
Recommended Products

Ensure a backup water supply for your home using the 4 faux wood rain barrels to collect rainwater from the gutter, made of durable plastic that resists weather and UV damage for an ideal addition to your backyard

【Effortless Assembly】Create your beautiful gardening space quickly with our greenhouse kit. The package comes with a clear instruction manual and all the necessary tools, making setup straightforward. Our slide-in PC panels make assembly 40% faster and 35% more secure than conventional methods. Save time and effort while building a reliable and sturdy outdoor greenhouse.

【Effortless Assembly】Create your beautiful gardening space quickly with our greenhouse kit. The package comes with a clear instruction manual and all the necessary tools, making setup straightforward. Our -in PC panels make assembly 40% faster and 35% more secure than conventional methods. Save time and effort while building a reliable and sturdy outdoor greenhouse.
Installation Mistakes That Waste Water and Money
If you’ve carefully followed the setup steps but still notice water loss or reduced system efficiency, installation mistakes are likely the culprit. Incorrect placement of your catchment area or storage tank can markedly reduce water collection. Oversized gutters may seem beneficial, but they actually slow water flow and increase debris accumulation. Positioning tanks in direct sunlight causes algae growth, degrading water quality for your garden. Failing to install proper slope on conveyance pipes prevents water from flowing efficiently toward storage. Inadequate filtration system placement allows sediment to reach your tank, clogging distribution lines. Finally, neglecting to secure pipes and connections creates leaks that waste collected water. Reviewing these common errors helps you maximize system performance and protect your investment.
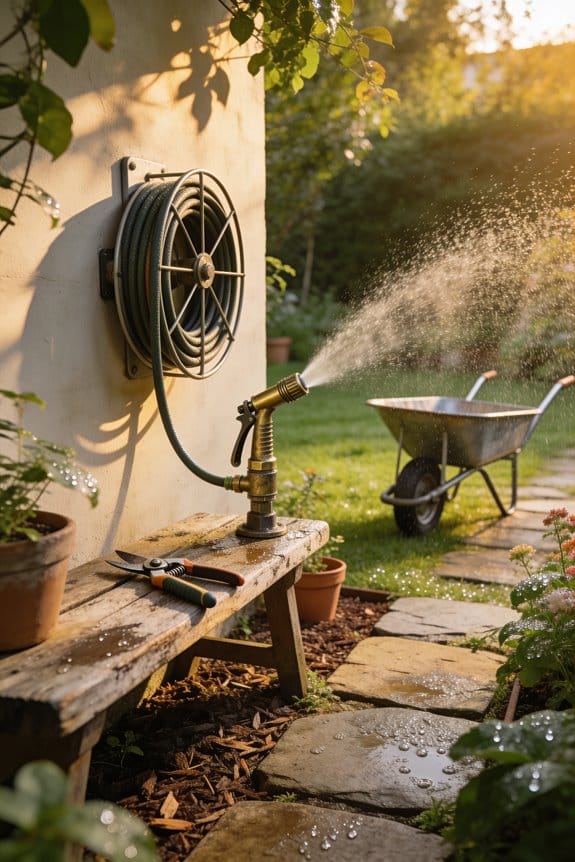
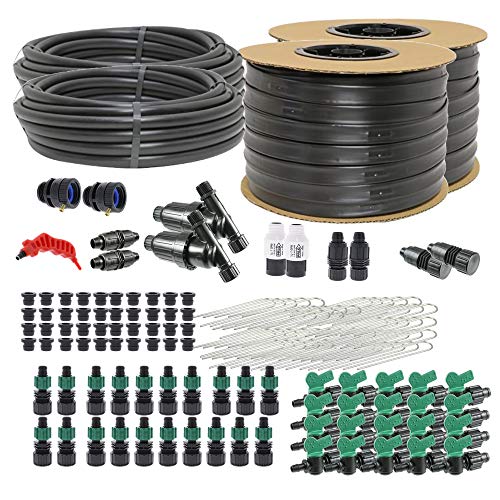
Connecting Rainwater to Your Garden Irrigation
Once you’ve collected and filtered your rainwater, connecting it to your garden irrigation requires careful planning to guarantee water flows where you need it most. I’d recommend installing automatic valves that switch between your rainwater supply and municipal water when your tank runs low, ensuring your garden never goes thirsty. Using drip adapters lets you attach soaker hoses or drip lines directly to your storage tank or pump outlet, delivering water efficiently to plant roots. For larger gardens, consider adding a submersible pump to increase water pressure for sprinkler systems. Include backflow preventers to protect your main water supply from contamination, and install vent pipes to prevent vacuum issues during filling cycles.
Recommended Products
Timer Compatible : Yes; Rain Barrel Compatible : Yes; Expandable : Yes; Average Assembly Time : 60 + min.; Operating Pressure : 10-15 PSI; Maximum Flow Capacity : 480 GPH;

Standard 3/4" Garden Hose Thread Connections

Timer Compatible : Yes; Rain Barrel Compatible : No; Expandable : Yes; Average Assembly Time : 20 - 30 min.; Operating Pressure : 10-25 PSI;
Seasonal Maintenance to Keep Your System Running
To keep your rainwater harvesting system functioning efficiently year-round, you’ll need to perform regular maintenance tasks that change with the seasons. Spring calls for cleaning gutters and inspecting pipes for winter damage, while summer demands checking tank levels and filter conditions. Fall requires clearing debris from catchment areas before winter arrives. Winter maintenance includes winterizing filters to prevent freezing damage and protecting exposed pipes with insulation. Seasonal inspections are essential for identifying leaks, corrosion, or sediment buildup in storage tanks. I recommend draining tanks completely before harsh weather and testing pumps monthly. Regular maintenance extends your system’s lifespan, guarantees water quality remains high, and prevents costly repairs that could interrupt your garden’s water supply when you need it most.
Frequently Asked Questions
Is Rainwater Harvesting Legal in My Area, and Are There Permit Requirements?
I can’t definitively answer your specific situation since legality varies by location. You’ll need to check your local regulations and water rights laws, as some areas restrict rainwater harvesting while others encourage it. Contact your local water authority for permit requirements.
Can I Use Harvested Rainwater for Drinking or Cooking After Filtration?
I’d advise against it. While filtration helps, harvested rainwater isn’t potable without boil purification and mineral supplementation. Municipal water meets strict safety standards that rainwater systems can’t reliably guarantee for drinking or cooking purposes.
How Much Money Can I Save on Water Bills With Rainwater Harvesting?
I’ll save you thousands yearly—the market’s valued at $890.2 million for good reason. Your estimated savings depend on rainfall and garden size, but you’ll see significant meter reduction once you’re harvesting consistently.
What Happens to My System During Freezing Winter Temperatures?
During freezing winters, I’d recommend pipe insulation and drain systems to prevent ice damage. You’ll want to empty your storage tank before temperatures drop and install freeze protection measures like heat tape or insulated covers on exposed components.
How Often Should I Clean My Gutters and Pre-Filters?
I’d recommend regular gutter maintenance monthly during rainfall seasons. Pre-filters need checking every few weeks. Seasonal inspections before spring and fall guarantee efficient system performance, preventing debris buildup that compromises water quality.