A smelly garden hose develops because stagnant water, sunlight exposure, and trapped organic debris create the perfect environment for bacteria and algae to grow. You can disinfect it by soaking the hose in a bleach solution (60 ml bleach per 5 liters water) for 8–24 hours, then rinsing thoroughly with clean water. For a safer alternative, soak it in vinegar or apply baking soda directly to stubborn buildup. You’ll also want to clear internal blockages mechanically using pins or a damp sponge before flushing. Draining your hose completely after every use prevents future problems, though there’s more to discover about proper storage and winterization.
Key Takeaways
- Soak the hose in a bleach solution (60 ml bleach per 5 litres water) for 8–24 hours to eliminate algae and bacteria effectively.
- Use vinegar and baking soda as a safer alternative; soak in vinegar and apply baking soda paste to the nozzle for 30 minutes.
- Mechanically clear nozzle holes using needles or pins matching hole diameters to dislodge stubborn debris and algae buildup.
- Insert a damp sponge into the hose and flush forcefully to scrub interior walls and remove loosened sediment and algae.
- Drain the hose completely after every use and store it loosely in a sheltered location to prevent future algae and bacterial growth.
Why Garden Hoses Develop Smell and Algae
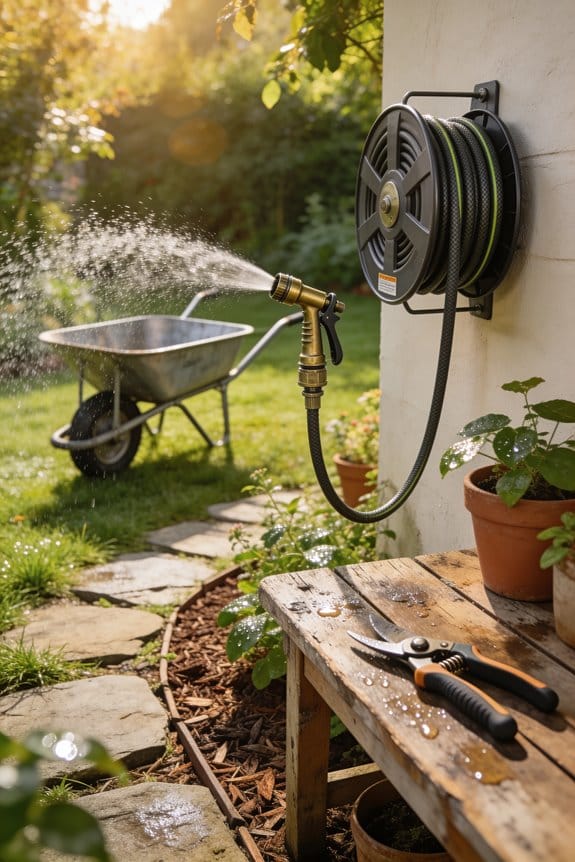
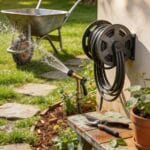
Because garden hoses remain exposed to sunlight, moisture, and organic debris for extended periods, they create ideal conditions for unpleasant odors and algae growth. When you don’t drain your hose after use, stagnant water accumulates inside, providing the perfect environment for bacteria and algae to thrive. This stagnant water combines with organic buildup—leaves, dirt, and plant matter—that enters through the nozzle or gets trapped during storage. Sunlight accelerates algae reproduction, while the enclosed hose environment traps moisture that promotes bacterial growth. These microorganisms release compounds that create that distinctive musty smell you’ve likely noticed. Temperature fluctuations and lack of air circulation further intensify the problem. Understanding these causes helps you appreciate why regular maintenance and proper drainage are essential for keeping your hose fresh and functional.
Bleach Soaking for Deep Disinfection

You may be interested

Now that you understand how bacteria and algae colonize your garden hose, you can take action with one of the most effective cleaning methods available: bleach soaking. I’ll guide you through this process carefully.
First, measure 60ml of bleach into a 5-litre bucket of water. Before using this solution, perform concentration testing to make certain the mixture is safe and effective. Submerge your hose in this bleach solution for 8-24 hours, allowing the disinfectant to penetrate and eliminate germs and debris buildup.
After soaking completes, rinse your hose thoroughly in a second bucket containing bleach-free water. Then flush it with running water to remove any remaining buildup. Finally, address bleach disposal responsibly by pouring the solution down a drain with plenty of water, following local environmental guidelines.
Recommended Products

Durability Rug: This runner rug is durable and wear-resistant with faced polypropylene+Bottom back PVC that color will not fade, even in sunlight. Perfect for high traffic areas, long hallways, stairs. Note: The color of each batch of carpets have a difference. If it needs to be placed in the same area, it is recommended to buy a batch of rugs.

Powerful Cleaning Performance: This electric pressure washer delivers up to 4800 PSI water pressure with 2.8 GPM flow rate, easily blasts away dirt, mud, mold and grime from cars, driveways, patios, decks and outdoor furniture without tedious scrubbing.

Eco-Friendly Outdoor Seating: Our chairs, crafted from durable Glass Fiber Reinforced Polypropylene, offer sustainable luxury for any setting. With the ability to stack up to 7 high, they're a perfect fit for patios, decks, gardens, and commercial spaces like restaurants and hotels. Designed to withstand diverse weather conditions, they promise year-round enjoyment and easy storage solutions.
Vinegar and Baking Soda Hose Cleaning

If you’re looking for a natural alternative to bleach, vinegar and baking soda offer an effective cleaning method that works through chemical reaction rather than harsh disinfectants. I recommend measuring 120ml of vinegar into a bucket of water, then soaking your hose up to 24 hours as a natural disinfectant. For stubborn buildup, I combine baking soda and vinegar directly on the nozzle, creating a foaming action that breaks down debris. I let this mixture sit for 30 minutes, repeating the process for layered dirt removal. This approach harnesses natural enzymes and mild acidic properties, making it safer than bleach while remaining effective. After treatment, I rinse thoroughly with clean cold running water until all residue disappears completely.
Recommended Products

5-in-1 Cleaning Power — Effortlessly clean every pool surface, waterline, walls, floor, and clarify water, using one device. Save time and effort with innovative submarine propulsion. (Includes Clarifying Agent Kit)

🧼【Lightweight】Featuring a premium carbon fiber pole weighing as little as 1803g (7.5m), combined with a buoyancy-designed dual brush head, this solar panel cleaning brush feels almost weightless during use, greatly reducing fatigue and making it easy to clean large surfaces efficiently.

🧼【Lightweight】Featuring a premium carbon fiber pole weighing as little as 1803g (7.5m), combined with a buoyancy-designed dual brush head, this solar panel cleaning brush feels almost weightless during use, greatly reducing fatigue and making it easy to clean large surfaces efficiently.
Clear Internal Blockages Mechanically

Sometimes chemical soaking alone won’t dissolve stubborn blockages deep inside your hose, which is when mechanical cleaning becomes necessary to restore full water flow. I’ve found needle poking to be highly effective for dislodging debris stuck in the nozzle holes. Select needles or pins that match each hole’s diameter, then carefully insert them to break apart accumulated dirt and mineral deposits.
For larger internal blockages, I recommend inner rolling techniques. Insert a damp sponge into the hose end, add tissues around it, then flush with water forcefully. The sponge scrubs interior walls while tissues capture loosened material. Repeat this flushing process until clean water flows freely. This combination approach removes stubborn algae and sediment that chemical methods miss.
Recommended Products

【Realistic Appearance】The artificial grass turf with mixed 4 tones looks really realistic, and walking on it barefoot feels as soft and skin-friendly as real natural grass. The grass with 80 oz/square yard high-density is about 1.38" long, fluffy and lush, providing you with year-round green and turf enjoyment.

5 year parts & labor warranty when purchased from an authorized reseller

【Realistic & Enduring】The high-density grass is about 0.4" long, walking on it barefoot feels as soft as real grass. Our grass turf is anti-UV, high-temperature resistant, and flame-retardant, it has excellent weather and impact resistance, and can withstand high traffic. The 3-layer latex backing adopts advanced tufting weaving technology, making the fake turf rolls not easy to tear and fall off, providing you with year-round green and turf enjoyment.
Clean Nozzles and Fittings Without Damage

While clearing internal blockages restores water flow through your hose, the nozzle and fittings require their own careful attention because they’re vulnerable to damage from aggressive scrubbing. I recommend soaking your nozzle and fittings in warm water with mild dish soap for 30 minutes, which loosens stubborn debris without harsh chemicals. Using a non-abrasive sponge or soft toothbrush, gently scrub the components to avoid leaving gentle toolmarks that might compromise their integrity. Pay special attention to threaded areas, where thread preservation is essential for proper connections. Rinse thoroughly with clean water and dry completely with a cloth. Always wear gloves and guarantee proper ventilation during this process. Careful handling prevents costly replacements and maintains your equipment’s longevity.
Recommended Products


Delivering up to 3000 psi at 4 US gpm, this pressure washer pairs a 7.5 hp Canpump solid shaft electric motor to hollow shaft triplex pump, providing the power you need for industrial cleaning maintenance and general-purpose cleaning.

Suction and drainage pumps run Simultaneously for continuous, uninterrupted suction
When to Replace vs. Repair Your Hose
After you’ve cleaned your hose thoroughly, you’ll need to assess whether repair efforts are worthwhile or if replacement makes more sense. Consider your hose’s age and condition when making this decision. If your hose is relatively new, within the first two years of the replace timeline, repairs are typically justified. However, if it’s older or showing multiple problems like cracks, persistent leaks, or interior deterioration that cleaning didn’t resolve, replacement is more economical. Check your warranty considerations before deciding, since some manufacturers cover defects during specific periods. Weigh the cost of a new hose against repeated repair attempts. Generally, investing in a quality replacement hose proves more cost-effective than continuously fixing an aging one that’ll likely fail again soon.
Recommended Products
**POWERFUL B&S V-TWIN ENGINE:** Driven by a robust 23HP B&S V-twin double-cylinder gasoline engine (3600 rpm) with an electric start. Features a 6 gal fuel tank for reliable operations with highly efficient fuel consumption (under 6.7 L/h).

PEAK POWER TECHNOLOGY: Combines power of up to six EGO 56V ARC Lithium batteries to deliver up to 20,000 watts of power, equivalent to a 21-horsepower gas engine.

✅【WHAT'S INCLUDED & ACCESSORIES】AMS BROOKLYN Cream White Smooth Surfacae fire pit table, tempered glass windscreen, powder coated stainless-steel burner lid, Concrete propane tank cover matches fire table, canvas cover, lava rocks, 10ft. gas hose, repair kit and AAA batteries.
Drain, Store, and Inspect: Your Maintenance Checklist
Once you’ve decided to keep and repair your hose rather than replace it, establishing a regular maintenance routine becomes your best defense against future problems. I recommend draining your hose completely after every use, which prevents water from sitting inside where algae and bacteria thrive. When storing your hose, roll it loosely to avoid kinks that can damage the interior walls. Perform ventilation checks monthly to make certain air flows freely through the nozzle and connections. During seasonal rotation between spring and fall, inspect your entire hose for cracks, splits, or discoloration. These simple steps—draining thoroughly, storing properly, and inspecting regularly—protect your investment and keep your hose functioning reliably for years.
Winterize Your Hose Before Freezing Temperatures
As temperatures drop below freezing, water trapped inside your garden hose can expand and cause serious damage to the hose walls and connections. To protect your investment, I recommend draining your hose completely after the final use of autumn. Once drained, store it in a sheltered location like a garage or shed where freezing temperatures won’t reach it.
I also suggest you insulate connectors using foam covers or wrapping, which prevents ice formation at vulnerable joints. Cover ends with caps to keep moisture and debris out during winter months. Rolling your hose loosely and storing it away from direct sunlight helps maintain its flexibility. These winterization steps make certain your hose remains functional and damage-free when spring arrives.
Frequently Asked Questions
Can I Use Bleach and Vinegar Together to Clean My Garden Hose?
I wouldn’t recommend mixing bleach and vinegar together because they create a dangerous chemical reaction that produces toxic chlorine gas. I’d suggest using them separately—bleach first, then vinegar—for safe, effective cleaning.
How Often Should I Clean My Garden Hose to Prevent Odor and Algae Buildup?
I’d recommend draining after every use, flushing periodically, and adjusting cleaning frequency based on your seasonal maintenance needs and usage patterns. Regular inspection prevents odor and algae before they’re problematic.
Is It Safe to Drink Water From a Cleaned Garden Hose?
I wouldn’t recommend drinking from a cleaned garden hose without potable assurance. You’d need bacterial testing to confirm it’s safe, as cleaning methods aren’t designed for drinking water standards.
What Essential Oils Work Best for Eco-Friendly Garden Hose Exterior Cleaning?
I’ve found that tea tree oil works exceptionally well for exterior cleaning since it’s naturally antimicrobial. You can also use lavender oil, which I prefer for its pleasant scent. I simply wipe either oil on a cloth and rub the hose’s outside surface.
Can I Use a Pressure Washer to Clean the Inside of My Hose?
I’d advise against pressure washing your hose’s interior. Instead, I recommend using a nozzle attachment with running water, mechanical flushing, or soaking methods. These gentler approaches won’t damage your hose while effectively removing buildup and algae.