I can remove rust from garden tools using everyday household items. For light rust, I’ll soak the tools in white vinegar for several hours, then scrub with steel wool. If rust is heavier, I’ll mix vinegar with salt or use a baking soda paste for tools I can’t submerge. After scrubbing away the loosened rust, I’ll rinse thoroughly, dry completely, and coat everything with protective oil. To prevent rust from returning, I’ll store my tools in a dry location and reapply oil periodically—the specifics of maintaining a rust-free collection deserve closer attention.
Key Takeaways
- Use white vinegar soaks for light to moderate rust; submerge tools for several hours, then scrub with steel wool.
- Create a vinegar-salt paste (16:1 ratio) for heavy corrosion; soak 12 hours to 3 days before scrubbing thoroughly.
- Apply baking soda paste to tools that cannot be submerged; let sit 30 minutes, then scrub with steel wool.
- Dry tools completely after rust removal, then coat all metal surfaces with protective oil like 3-IN-ONE or WD-40.
- Store cleaned tools indoors in dry, well-ventilated spaces with moisture-absorbing materials to prevent rust recurrence year-round.
Choose Your Rust-Removal Method by Severity
Before you start scrubbing away rust, I’d recommend evaluating how severe the corrosion is on your tools, since different rust levels respond better to different methods. Light surface rust calls for simple solutions like baking soda paste or lemon juice and salt, which work quickly without intensive soaking. Moderate rust benefits from vinegar soaks lasting several hours, while heavy corrosion requires extended soaking with a vinegar-salt mixture over multiple days. Your surface prep strategy depends on this assessment. Once you’ve chosen your method and cleaned your tools, proper storage options become pivotal for prevention. Keep your tools in a dry location, ideally with protective oil coating. This approach guarantees you’ll select the most efficient rust-removal technique for your specific situation.
Vinegar Soak: The Simplest Fix for Light Rust

You may be interested

Now that you’ve identified your tools’ rust severity, I’ll walk you through the vinegar soak method, which works best for light surface rust that hasn’t deeply eaten into the metal. Start by selecting an appropriate container—a jar, bucket, or basin works well—that’s large enough to fully submerge your tools. Pour white vinegar or a 50/50 vinegar-water solution into your container. Vinegar safety is important; make sure adequate ventilation since vinegar’s acetic acid can produce strong fumes in enclosed spaces. Submerge your rusty tools completely and let them soak for several hours. The acetic acid gradually dissolves rust, loosening it from metal surfaces. After soaking, remove your tools and scrub away remaining rust using steel wool or a scouring pad, then rinse thoroughly with water, dry completely, and apply protective oil.
When Vinegar Alone Isn’t Enough: The Salt Boost

If you’ve tried the basic vinegar soak and your tools still show stubborn rust, it’s time to step up your approach with a vinegar and salt mixture. I recommend mixing vinegar with salt at a 16:1 ratio, which enhances the rust-dissolving action for heavy corrosion. The salt works through electrochemical restoration, accelerating the breakdown of rust compounds on metal surfaces.
Soak your tools for 12 hours to 3 days, depending on rust severity. When applying this stronger solution, take safety precautions by wearing gloves and ensuring good ventilation. After soaking, scrape off loosened rust, then scrub lightly with steel wool. Rinse thoroughly, dry completely, and coat with 3-in-1 oil for protection against future rust formation.
Baking Soda Paste for Tools You Can’t Submerge

Not all garden tools work well when fully submerged in liquid, especially those with wooden handles or electric components that could be damaged by prolonged water exposure. For these tools, I recommend using a baking soda paste, which offers a non-abrasive alternative to harsh scrubbing methods.
To create this paste, I mix baking soda with water until it reaches a thick, spreadable consistency. I apply it directly to rust spots and let it sit for approximately thirty minutes, allowing the mixture to break down the corrosion. Afterward, I gently scrub the area with steel wool using circular motions to remove loosened rust.
Once I’ve removed the rust, I rinse the tool thoroughly, dry it completely, and apply a protective oil coating. This method proves ideal for tools requiring careful handling during cleaning and protective storage between uses.
Recommended Products
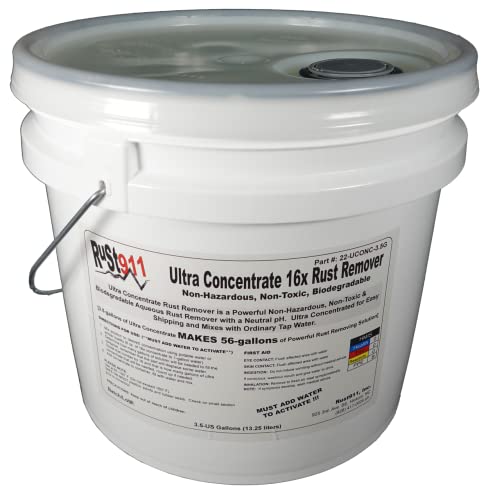
Rust911 Ultra-concentrate rust remover - 3.5-gallon makes 56-gallons (55-gallon drum) of powerful solution that completely removes rust without grinding, sanding or using harsh chemicals

100% PURE: Our citric acid is a food grade, 100% pure ingredient with excellent solubility for cooking, cleaning and many other household needs!

Pure Original Ingredients Washing Soda in a resealable bucket
Cola and Tin Foil: The Unexpected Power Combo

When you’re dealing with stubborn rust that won’t budge with standard methods, you might find success by turning to an unconventional combination: cola and tin foil. The phosphoric acid in cola effectively dissolves rust buildup on metal surfaces. I recommend soaking your tools in cola first, allowing the acidic solution time to penetrate and weaken the corrosion. After soaking, use crumpled tin foil for cola polishing, which creates controlled foil abrasion against the rust. The circular scrubbing motion removes loosened rust particles without damaging the underlying metal. Rinse thoroughly with soapy water, then clean water, ensuring you remove all cola residue. Dry your tools completely with a cloth before applying WD-40 or mineral oil for protection against future rust formation.
Lemon Juice and Salt for Stubborn Rust Spots
For stubborn rust spots that resist softer cleaning methods, a lemon juice and salt solution offers a potent alternative that harnesses natural acidity and abrasive properties. I combine one part table salt, one part lemon juice, and one part water to create an effective rust-fighting mixture. The salt’s abrasive granules work alongside lemon juice’s acidic nature to break down corrosion. I apply this solution directly to rusted areas, then use steel wool in circular motions to lift away loosened rust particles. After thoroughly rinsing the tool with water, I dry it completely with a clean rag. Finally, I coat all metal surfaces with a protective oil, such as lemon scented polish or mineral oil, preventing future rust formation and extending my tool’s lifespan.
Scrubbing Away Rust: Techniques That Work
Once you’ve softened the rust with a chemical solution, the scrubbing phase becomes essential to actually removing the corrosion from your tools. I recommend wearing protective gloves during this process to shield your hands from sharp edges and harsh materials. Steel wool, wire brushes, and abrasive brushes work effectively for lifting loosened rust particles. Use circular motions when scrubbing, applying moderate pressure to avoid damaging the underlying metal. For stubborn rust, crumpled tin foil creates an excellent abrasive surface that won’t scratch your tools excessively. Work systematically across the entire rusted area, checking your progress frequently. Once you’ve removed visible corrosion, rinse thoroughly with clean water and dry completely before applying protective oil to prevent future rust formation.
Recommended Products

RUST ENCAPSULATOR: Iron oxide is no match for our original Eastwood Rust Encapsulator. This paint-over-rust solution quickly stops surface rust before it can compromise the part’s structural integrity. Rust Encapsulator penetrates deep into the metal

Strips coatings and preps surfaces more effectively than wire brushes

Dry and Oil Your Tools to Lock Out Moisture
Protecting your freshly cleaned tools requires two critical final steps: thorough drying and applying a protective oil coating. After rinsing away all vinegar residue or cleaning solution, I use a clean rag to remove every water droplet from the metal surfaces. Any remaining moisture will cause rust to return quickly.
Once completely dry, I apply 3-IN-ONE oil, mineral oil, or WD-40 to coat all metal parts. This protective layer creates a barrier against oxygen and humidity. I make sure to store indoors in a dry location whenever possible, as humidity control prevents rust formation. Storing tools in a garage, shed, or basement rather than outside markedly extends their lifespan. This simple maintenance routine keeps my garden tools rust-free and ready for use.
Recommended Products

Inspired by bird's nest shape, the Erotr assembled cushioned sofa set for 5 person combines comfort, elegance and durability. Curved scoop armrest, supportive backrest and deep cushioning offer an enveloping ultimate relaxation

Woven Rattan & Iron outdoor furniture set: The Half-Moon curved patio sofa set is constructed of durable steel frame with E-coating for excellent performance on anti-corrosion and long-lasting durability. The iron craftsmanship paired with woven rattan adds artistic charm

Attractive Appearance and Design: UV-protected to help prevent fading and cracking with stain-resistant exterior that never needs painting
Mistakes That Cause Rust to Come Right Back
Even after you’ve carefully cleaned and oiled your garden tools, rust can return quickly if you make common mistakes during the cleaning and storage process. Failing to dry tools completely leaves moisture that promotes corrosion. Wet storage environments accelerate rust formation markedly, so keep tools in dry locations away from humidity. Chemical residues from vinegar or salt solutions, if not thoroughly rinsed away, continue reacting with metal surfaces and cause new rust spots. Additionally, skipping the oil coating step leaves metal exposed and vulnerable. Finally, storing tools in damp sheds or basements without proper ventilation creates ideal conditions for rust development. By addressing these mistakes—ensuring complete drying, proper rinsing, consistent oiling, and appropriate storage—you’ll successfully prevent rust from returning to your clean garden tools.
Recommended Products

【Cast Aluminum Built To Last】Our set is made of sturdy and durable cast aluminum for long-term durability. Resistant to rust, weather, fade, crack. The patio furniture set features an oil-rubbed bronze finish for a timeless look that is designed to withstand the elements year-round. If you use this set by the pool, it’s all-weather quality helps prevent water damage caused by wet swimsuits and splashing. It is also easy to clean, you just need to use a cloth to easily wipe away the dirty things.

【Cast Aluminum Built To Last】Our set is made of sturdy and durable cast aluminum for long-term durability. Resistant to rust, weather, fade, crack. The patio furniture set features an oil-rubbed bronze finish for a timeless look that is designed to withstand the elements year-round. If you use this set by the pool, it’s all-weather quality helps prevent water damage caused by wet swimsuits and splashing. It is also easy to clean, you just need to use a cloth to easily wipe away the dirty things.

☞【About The Pump】:Submersible well pump 220-240V/60Hz(Single-phase); Plug Type: US Plug; Pump Head Material:Stainless Steel 304; The length of cable: 15m (50ft); Outlet: 1/2 inch;rated power: 0.37KW/0.5HP; Pump Max. flow rate: 1m³/h, 4.4GPM; Pump Max. head: 50m/164ft; ✍ NOTE: Please confirm whether the voltage and frequency compatible with your local standards before you order and NOTE: It is prohibited to use with no water,The well outlet min size have to be more than 55mm is better.
Keep Your Tools Rust-Free Year-Round
Now that you’ve mastered the techniques for removing rust and understand what mistakes to avoid, the real work begins: maintaining your tools so rust doesn’t return in the first place. I’ve found that seasonal storage makes a significant difference in preventing corrosion. During winter months or rainy seasons, store your tools in dry locations away from humidity. Humid environments accelerate rust formation, so consider using a shed, garage, or storage box with moisture-absorbing materials. Before storing tools long-term, I always apply a protective oil coating to all metal surfaces. Keep tools organized and accessible so you’ll use them regularly—tools stored improperly for extended periods develop rust more easily. With consistent care and proper storage practices, your garden tools’ll remain rust-free throughout the year.
Recommended Products

SWIVEL & ROCKING:Our patio dining set includes smooth swivel rockers, the comfort of curved arms, and a high backrest, the 360-degree full rotation makes it easy to redirect your attention and get in and out while the 15-degree gentle rocking motion offers ideal relaxation

SUNSHINE VALLEY OUTDOOR FURNITURE SETS: The metal outdoor furniture set includes 1 3-seater sofa, 2 swivel chairs,2 single chairs, and 1 set of nesting tables.Each single chair can support 300 lbs, and the 3-seater sofa can support 900 lbs.Suited for your backyard, porch, garden, and deck,this set creates a comfortable outdoor space for your family
Frequently Asked Questions
How Long Can I Safely Store Tools After Rust Removal Before They Rust Again?
I’d say you’ve got weeks to months before rust creeps back, like Prometheus’s punishment returning. Your storage duration depends heavily on climate impact—humidity and moisture are rust’s best friends, so I’d re-oil every few weeks in damp conditions.
Can I Use These Methods on Tools With Wooden or Plastic Handles Safely?
I’d recommend being cautious with wooden or plastic handles. Keep them wood safe and plastic friendly by avoiding full submersion—only soak the metal parts. Wipe handles dry immediately to prevent damage or deterioration.
What’s the Best Way to Remove Rust From Hard-To-Reach Crevices and Joints?
I’ve found that tight spaces are like locked doors—you need the right key. I use cotton swabs dipped in vinegar soak to reach joints, then work a wire brush through crevices. For stubborn spots, I apply baking soda paste beforehand.
Are There Any Household Items I Should Avoid Using on Delicate or Valuable Tools?
I’d avoid abrasive chemicals and strong acidic cleaners on delicate or valuable tools, as they can damage finishes and weaken metal. Instead, I’d use gentler methods like baking soda paste or diluted vinegar solutions for protection.
How Often Should I Apply Protective Oil to Maintain Rust Prevention Year-Round?
I’d recommend applying protective oil every three to six months, depending on seasonal applications and your climate. In humid regions, you’ll want more frequent oiling, while drier climates need less maintenance.