The best way to hang garden tools depends on three factors: weight capacity, available wall space, and how often you access each tool. For heavy items like shovels and rakes, you’ll want wall-mounted systems or French cleats rated for 250–300 pounds secured to studs. Single-layer setups prioritize quick access, while multi-layer configurations with 12-inch spacing maximize storage density. Proper installation requires locating studs, using 3.5-inch screws, and maintaining level alignment. Understanding these variables helps you select the system that fits your specific garage setup and tool collection.
Key Takeaways
- Choose wall-mounted systems rated for 250–300 pounds to safely support heavy garden tools like shovels and rakes.
- Locate studs and use 3.5-inch screws for secure installation; undersized fasteners cause the most common mounting failures.
- Single-layer arrangements maximize accessibility; multi-layer setups with 12-inch spacing increase capacity for larger tool collections.
- French cleats offer reconfigurable flexibility without permanent installation, enabling seasonal tool rotation and adjustments.
- Vertical organization reclaims floor space, improves tool visibility, clears pathways, and reduces time spent searching for items.
Why Wall Mounting Beats Every Other Storage Method
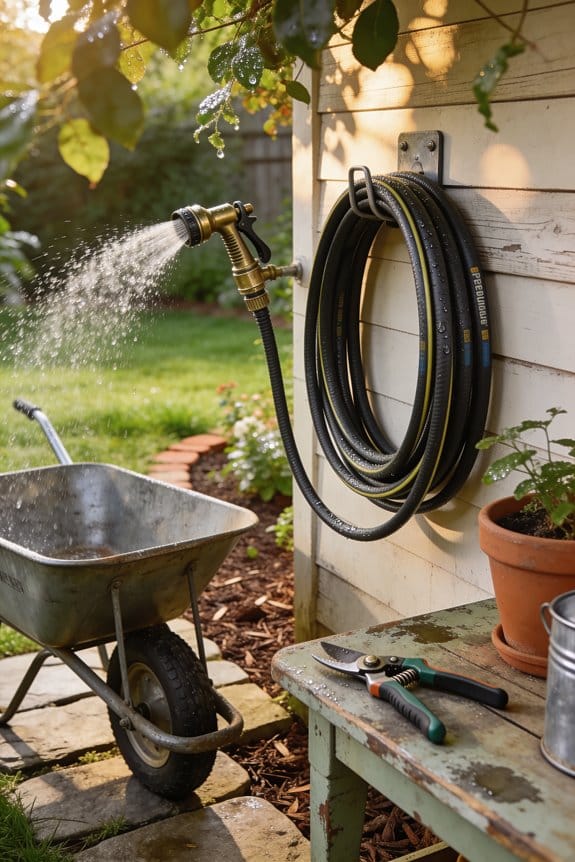
Wall mounting garden tools consistently outperforms other storage methods because it reclaims valuable floor and shelf space while keeping your most-used equipment within arm’s reach. I’ve found that vertical organization dramatically improves space optimization, especially in smaller garages or sheds where floor room’s limited.
When you mount tools on walls, you achieve visual orderliness that makes identifying what you need simple and quick. Unlike floor storage, which creates clutter and tripping hazards, wall systems keep pathways clear. You’ll spend less time searching for rakes, shovels, or hoses when they’re organized at eye level.
Additionally, wall mounting protects your tools from damage caused by stacking or improper storage. The accessibility factor can’t be overstated—grabbing equipment takes seconds rather than minutes. This efficiency translates directly into saved time during yard work.
Five Wall Storage Systems: Ranked by Cost, Capacity, and Installation Time

Several practical options exist for organizing garden tools on walls, each with distinct advantages depending on your budget, the weight of equipment you’re storing, and how much time you want to spend installing the system. Wire hook methods offer the most budget options, using inexpensive 12-gauge copper wire bent to custom shapes on plywood. Pegboard systems provide quick installs with standardized hooks, though they suit lighter tools better. DIY wood runners enable modular upgrades by stacking two layers with adjustable spacing. Wall-mounted commercial systems deliver aesthetic finishes and maximum capacity up to 300 pounds, requiring stud mounting for security. French cleats allow reconfigurable setups without permanent installation, balancing flexibility with stability for various tool weights and organizational needs.
Recommended Products

【Broom Holder and Garage Organizer】This broom organizer is suitable for organizing your cleaning supplies, garden tools, sporting goods, kitchenware, bathroom accessories and hardware tools. The mop and broom holder will be the best companion in your kitchen, bathroom, garage room, and laundry room, even on the shed of your garden, keep your work space clean and tidy.

THE FAST WAY TO ORGANIZE: Equipped with rails, hooks, shelves and cabinets it’s an easy storage solution that can grow as life changes.

【Large Storage Capacity】This rack boasts an impressive storage capacity, accommodating most of your garden tools, including rakes, shovels, hoes, and various other tools, transforming your space into a tidy and organized environment.
Choosing Your System: Weight Limits, Space, and Access

Now that you understand the available options, you’ll need to evaluate which system fits your specific situation by considering three key factors: how much weight you’re storing, how much wall space you have available, and how easily you need to access your tools. Heavy items like shovels and rakes require sturdy systems rated for 250–300 pounds, such as wall-mounted organizers or French cleats. Limited wall space calls for multi-layer configurations with 12-inch spacing between runners. If you rotate tools seasonally, adjustable systems like French cleats offer flexibility without reinstallation. Child safety demands secure mounting to wall studs with proper fasteners, ensuring hooks won’t dislodge during accidental contact. Single-layer arrangements prioritize accessibility, while deeper systems maximize density but require reaching past forward tools.
Recommended Products
Set Includes: 3x Multi-Use Lockers, 2x Rolling Tool Drawer Cabinets, 1x Two-door Base Cabinet, 3x Wall Cabinets, 1x 72 in. Stainless Steel Worktop, 1x 72 in. Backsplash Kit, 1x LED lights with power adapter and 2x LED Lights with Connector Cable

Set Includes: 1x Multi-Use Locker, 1x 42 in. Extra-Wide Locker, 1x 62 in. Project Center, 3x Wall Cabinets, 1x 62 in. Bamboo Worktop, 1x 72 in. Backsplash Kit, 1x LED Light 2700K with power adapter and 2x LED Light 2700K with connector cable

Set Includes: 1x 42 in. Multi-Use Locker, 1x Project Center, 1x Multi-Use Locker, 3x Wall Cabinets and 1x 62 in. Bamboo Worktop, 1x 72 in. Backsplash Kits
Single vs. Multi-Layer Wall Storage: Trade-Offs You Need to Know

When you’re deciding how to organize your garden tools on a wall, one of the most important choices you’ll make is whether to use a single row of hanging space or stack multiple layers. Single-layer systems prioritize accessibility, letting you grab any tool without moving others first. However, multi-layer setups maximize your available space by installing runners or French cleats with 12-inch spacing between rows. This creates significant space tradeoffs: you gain storage capacity but sacrifice convenience. Access sequencing becomes critical in multi-layer configurations—you’ll need to remove wall-proximal tools before reaching items behind them. Consider your garage dimensions and how frequently you use each tool. Single layers work best for smaller collections, while multi-layer systems suit extensive tool inventories where space efficiency matters more than immediate access.
Recommended Products

STRONG & DURABLE: Constructed with high strength aluminum and steel | Matte black powder coat is scratch and rust resistant | Vertically hang your garden and yard tools | Portable Floor Stand can be moved around garage or shed

1. [Extra heavy duty] metal heavy duty tool cart, can hold 22 heavy duty long handled garden tools, 5 light duty cleaning tools, lots of small tools, maximum weight 300 lbs

DURABLE GARAGE SLAT WALL STORAGE SYSTEMS: Our premium PVC wall organizer are built to withstand harsh conditions and are 30 times more durable than drywall. They are fireproof, waterproof, fade-proof, dry-proof, crack-proof, peel-proof, and have an extra-high weight capacity of up to 75 pounds per square foot. Our slatwall panels can be easily cut to any desired size or combined into larger sections allowing you to perfectly install panels for your entire wall.
Installation Fundamentals: Studs, Fasteners, and Safety

Before you install any wall-mounted tool system, you need to locate the studs in your wall, as they’re the only structural elements strong enough to safely support heavy garden tools like rakes and shovels. I recommend using a stud finder to identify these wooden beams behind your drywall. Once located, use 3.5-inch screws through runners directly into studs, or 2.5-inch wood screws for French cleats, making certain they’re level and secure.
Perform load bearing checks by verifying your system’s weight capacity matches your tool collection. Base systems typically support 250–300 pounds when properly mounted. Maintain safety clearances by spacing multi-layer systems 12 inches apart, allowing safe tool access without interference. This foundation prevents accidents and makes sure your storage system remains stable and reliable long-term.
Recommended Products

【Top-Flight Performance 】The 51.2V 100Ah liFePO4 battery is manufactured by 16Pcs Automotive Grade A grade prismatic cells with higher energy density, more stable performance & greater power. And has a compact 5.12kWh energy, which is equivalent to 4pcs 12V 100Ah LiFePO4 batteries in 4S (or even 8pcs 12V 100Ah AGM batteries in 8S). Fully compliant with the UL1973 safety standard and certified by Intertek ETL for reliable safe operation.

Set Includes: 4x Multi-Use Lockers, 2x Rolling Tool Drawer Cabinets, 2x Two-Door Base Cabinets, 4x Wall Cabinets, 2x 48" Bamboo Worktops, 2x 48" Backsplash Kits, 1x LED Lights with Power Adapter and 3x LED Lights with Connector Cable

ADJUSTABLE RATCHETING CARGO BAR - Our heavy duty trailer load bars for box truck extends from 88.98" to 103.94" and are intended for semi trailers and enclosed van trailers. Note: This is too large for pickup trucks, SUVs, Minivans, or small trailers.
Building Custom Wire Hooks or Wood Runners (Advanced DIY)
If you’re ready to move beyond standard commercial systems, building custom wire hooks or wood runners allows you to create storage solutions tailored specifically to your garden tools and wall space. For wire hooks, I’d use 12-gauge Romex copper wire, which bends into custom shaping that accommodates various tool sizes better than pegboard alternatives. Mount plywood first, then fashion wire directly for each tool, enabling denser spacing. With wood runners, I’d use 1×3 or 1×4 lumber placed over two layers, securing them to studs with 3.5-inch screws spaced 12 inches apart. Mark tool positions on runners for consistent placement. Both methods require wire finishing touches like smoothing sharp edges, ensuring safety while maximizing your storage efficiency and accessibility.
Recommended Products

All-Weather Durability: Pro-Tect tested and proven to withstand up to 9,200 pounds or 30 inches of snow load, and winds up to 100 mph (product must be anchored as specified in the Backyard Discovery instruction manual); Patent pending

SHARP AND STURDY: These heavy-duty, solid tent stakes are suitable for many kinds of soil, asphalt, and even concrete with proper drilling. The tips of the spikes are sharp and can penetrate the lawn base (grass, sand, clay, etc. ) easily and stay in place. They are easy to use & durable enough without bending.

Attractive Exterior - UV-protected to help prevent fading and cracking. Stain-resistant exterior never needs painting
Mistakes That Fail: And How to Fix Them
Since most wall-mounted garden tool systems fail due to improper installation rather than poor design, I’ve found that understanding common errors makes prevention straightforward. Overloaded hardware ranks as the primary culprit, when people exceed weight limits by ignoring manufacturer specifications. I’d recommend checking capacity ratings before mounting anything. Misaligned runners create accessibility problems and structural weakness. When installing two-layer systems, I make certain runners sit perfectly level using a spirit level and maintain exactly 12 inches between layers. Another frequent mistake involves skipping stud location altogether, which causes catastrophic failure on drywall alone. I always locate studs first with a finder tool. Additionally, using undersized screws weakens connections. Verify you’re using 3.5-inch screws into studs for runners, securing your investment properly and preventing costly accidents.
Frequently Asked Questions
How Do I Protect Wall-Mounted Garden Tools From Rust and Weather Damage?
I’d recommend you apply rust inhibitors and weatherproof coatings directly to your tools before hanging them. The Weatherproof Tool Rack made of Larchwood naturally resists moisture, and you’ll want to regularly inspect hooks for corrosion.
Can I Install Wall Storage Systems on Drywall Without Studs, and if So, How?
You’ve got to think outside the box here. I’d recommend toggle anchors for lighter loads or removable cleats that mount without studs. French cleats work best—they’re adjustable and won’t damage your drywall permanently.
What’s the Best Way to Organize Tools by Frequency of Use on Wall Systems?
I’d place your Everyday Essentials—pruners, shears, hoses—at eye level for quick access. Store Infrequent Specials like hedge trimmers higher up. This arrangement minimizes reaching time for tools you’ll constantly grab.
How Do I Safely Remove and Relocate Wall-Mounted Storage Systems After Installation?
Like a chess player repositioning pieces, I’ll help you master relocation. You’ll need hardware removal tools—unscrew anchors carefully, patch holes, then plan relocation logistics by measuring new stud locations and reinstalling with fresh fasteners.
Are There Specific Seasonal Maintenance Requirements for Outdoor Wall-Mounted Tool Storage?
I’d recommend conducting seasonal inspections before winter arrives to check for rust and corrosion. Winterizing hardware by applying protective coatings helps prevent deterioration from moisture and freezing temperatures throughout the colder months.