

I’ll help you stop forgetting to water by setting up an automated irrigation timer. First, choose a timer matched to your garden’s zones and layout, then set the current date and time with backup battery installed. Program start times around early morning (5:45–6:00 AM) to reduce evaporation, and group zones with similar water needs together. Test each station manually to catch leaks or clogs, activate rain delay during wet weather, and fine-tune durations based on plant type and soil conditions. The steps ahead cover each setup stage in detail.
Key Takeaways
- Select a timer complexity matching your garden zones and layout; smart controllers work best for multiple plant types.
- Set accurate date, time, and timezone before programming to ensure watering occurs at correct times automatically.
- Schedule early morning watering around 5:45–6:00 AM to reduce evaporation and pair zones with similar water needs.
- Test each station manually to verify operation, inspect for leaks and clogs, and adjust run times accordingly.
- Calibrate moisture sensors regularly and monitor soil conditions to prevent both overwatering and underwatering your garden.
Choose the Right Timer for Your Garden Size and Layout
Before you purchase and install an irrigation timer, you’ll want to assess your garden’s specific needs, which depend on how many zones you’re watering and how complex your layout is. Consider whether you’re managing a small vegetable patch or an expansive landscape with multiple plant types requiring different watering schedules.
Modern smart controllers offer flexibility for intricate gardens, allowing you to program separate schedules for turf zones and drip systems. Wireless integration features enable remote adjustments from your smartphone, providing convenience without manual adjustments at your timer location.
For simpler gardens with fewer zones, a basic timer with three programs suffices. Evaluate your garden’s layout, identify distinct planting areas, and count your total stations before selecting equipment that matches your specific requirements.
Recommended Products

Remote app control from your phone for all functions
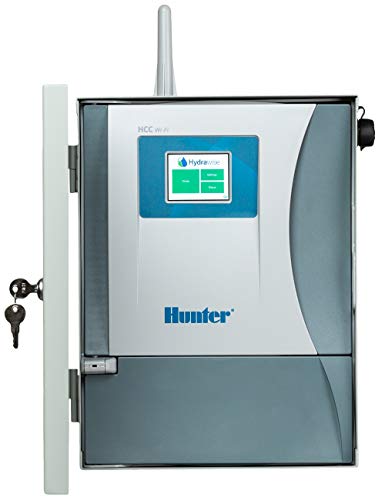
Wi-Fi enabled for quick connection to Hydrawise software.

24-STATION WIFI SMART SPRINKLER CONTROLLER: Take full control of up to 24 irrigation zones with this WiFi-enabled smart sprinkler controller. Perfect for large homes, estates, and commercial properties, manage your watering system remotely with the Hydrawise app or web portal from anywhere in the world.
Set Your Irrigation Timer: Date and Time
Once you’ve selected the right timer for your garden, the next essential step is setting the current date and time, which establishes the foundation for all future watering schedules. I use the plus and minus arrow buttons to cycle through year, month, day, and AM/PM selections until they match my location’s actual time. Battery synchronization guarantees the timer maintains accuracy even during power outages, so I verify the backup battery’s installation beforehand. Timezone adjustments matter if you’ve moved or travel seasonally, requiring recalibration to match your current location. Taking time to set this correctly prevents watering at incorrect times. Once the date and time are accurate, I’m ready to program specific watering cycles for my garden’s needs.
Program Start Times and Watering Frequency for Each Zone
With your date and time now accurately set, I’m ready to determine when my irrigation system should begin watering each zone and how often those cycles repeat throughout the week. I’ll consider my garden’s microclimate mapping to identify which zones need more frequent watering based on sun exposure and soil type. Early morning watering between 5:45 AM and 6:00 AM minimizes evaporation loss. For newly planted areas, I might add a second cycle at 4:00 PM. I’ll match my flow rate to each zone’s needs, ensuring drip systems receive longer run times than sprinkler zones. By programming different start times and frequencies per zone, I’ll optimize water distribution across my entire garden efficiently.
Recommended Products
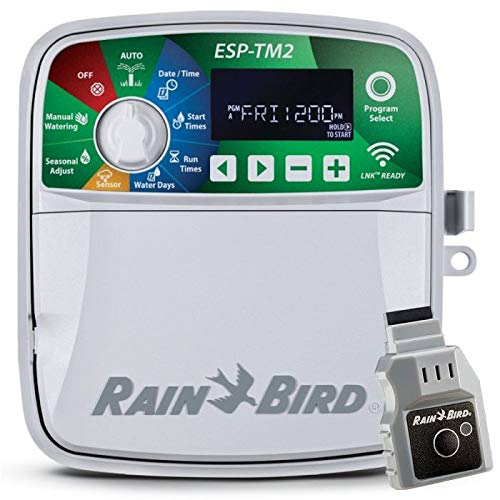
Controls up to 12 sprinkler zones, Quick to Install, Suitable for indoor or outdoor installations, Factory installed 6’ outdoor rated power cord for your convenience
12 ZONE CONTROL FOR COMPLETE LANDSCAPE COVERAGE: Easily manage up to 12 irrigation zones with precision. Ideal for residential yards, commercial properties, or multi-zone setups that require tailored watering.

WI-FI SMART TIMER WITH 365-DAY SCHEDULING – Automate complex electrical systems with this 3-circuit Wi-Fi programmable timer. Supports up to 256 ON/OFF events and 64 holiday blocks, making it ideal for year-round scheduling in commercial or industrial settings.
Set Run Times by Plant and Soil Type
Now I need to adjust each zone’s run time based on the specific plants I’m growing and the soil conditions in that area, since different plants require different amounts of water and various soil types absorb and retain moisture at different rates.
Sandy soil drains quickly, so I’ll need longer run times to make certain adequate water penetration. Clay soil retains moisture longer, requiring shorter durations to prevent overwatering. Loamy soil, a balanced mixture, typically needs moderate run times.
Plant water use varies markedly. Turf grass demands frequent, moderate watering, while desert plants need minimal irrigation. Drip systems serving low-water plants might require only two hours, whereas high-demand zones need four hours or longer.
I’ll start conservatively, then adjust durations by observing soil moisture and plant health. The manual button feature lets me test individual stations, confirming each zone receives appropriate water for its specific requirements.
Recommended Products
Remote app control from your phone for all functions

This highly responsive valve will open and close in less than 1 second when actuated; meaning it will open or close the flow instantaneously when energized or de-energized. Also, our U.S. SOLID engineers have determined that the life cycle of this
Pair Zones With Similar Water Needs to Reduce Waste
Grouping zones by water requirements—a strategy called hydrozoning—represents one of the most effective ways to eliminate irrigation waste and keep your plants healthy. When you group similar plants together, you can assign them to the same program with matching run times and schedules. For example, I’d place my turf zones under Program A for twice-daily watering, while my drip zones go under Program B for once-daily irrigation. This changeover scheduling approach prevents overwatering some plants while underwatering others. Desert plants might need watering every 14 days, whereas newly planted vegetation requires frequent cycles. By organizing your controller this way, you’ll make certain each zone receives exactly what it needs, maximizing water efficiency and plant health throughout your garden.
Test Each Station Manually Before Running Automated Schedules
Before you activate your automated watering schedule, test each station individually to verify that your system operates correctly and delivers water where it should. I recommend turning your timer’s dial to the “on” position and holding the manual button for three seconds to water on demand. This allows you to check specific zones without running the entire automated program.
During manual testing, observe each station’s performance carefully. Look for proper sprinkler head alignment, drip emitter function, and potential leaks or clogs. If your system includes sensor integration, verify that moisture sensors respond appropriately to water delivery. Test flow calibration by monitoring water pressure and confirming each zone receives adequate water volume. Making these adjustments now prevents problems once your automated schedule begins operating.
Recommended Products

1-Hour Class 350 Fire with Impact UL label. Tests include 1 hour exterior file exposure at 1700°F, a 2000°F explosion test, and a 30 foot drop to test impact integrity. Made in USA

UNDERHILL AUD-LT ON-SITE AUDITING KIT: Audit your water sprinklers with this handy kit to check if they’re performing poorly or wasting water. Maximize your efficiency and water savings. Made in USA.

✅ RELIABLE WATER LEVEL MEASUREMENT FOR REAL FIELD USE – Designed for accurate water depth checks in wells, boreholes, tanks, and irrigation systems. Built for users who need dependable readings in practical inspection and maintenance environments.
Skip Watering With Rain Delay During Wet Weather
During rainy periods, your irrigation timer’s rain delay feature prevents unnecessary watering cycles that would waste water and potentially damage your plants through overwatering. You can activate rain delay by pressing the plus button on your timer, which suspends scheduled watering for 24, 48, or up to 72 hours depending on your device’s capabilities.
This seasonal suspension proves especially valuable during monsoon seasons or extended wet weather when natural rainfall provides adequate moisture. If your system includes a rain sensor, it automatically detects precipitation and triggers the delay function without manual intervention. Simply resume normal programming once dry conditions return. Testing your rain delay feature verifies it functions properly before you need it during unexpected storms, protecting both your plants and your water bill simultaneously.
Recommended Products

For battery-powered operation of up to 4 automatic sprinkler or drip valves


Climate Logic ready - Automatically reschedules Rain Dial-R watering based on the weather
Fine-Tune Start Times and Duration as Seasons Change
As your plants’ water needs shift throughout the year, I’ve found that adjusting your timer’s start times and run durations becomes essential for maintaining a healthy garden. During summer months, you might increase watering frequency to twice daily, while winter requires less frequent irrigation. Seasonal adjustments should account for temperature, rainfall patterns, and plant growth stages.
I recommend scheduling nighttime watering during hot seasons to minimize evaporation loss. Spring typically needs moderate adjustments, whereas fall preparation involves gradually reducing water amounts. You’ll want to fine-tune durations by clicking the plus or minus buttons sequentially, testing individual stations to verify proper coverage.
Monitor your garden’s response and modify settings accordingly. This ongoing process guarantees your irrigation system adapts effectively to changing conditions throughout the year.
Verify System Performance Through Regular Station Checks
Regular station checks form a critical part of keeping your irrigation system running efficiently, since even small problems can waste water and harm your plants’ health. I recommend testing each zone individually using your timer’s manual button feature to observe how water flows through each station. While performing these checks, you’ll want to monitor pressure levels at different points in your system, as pressure monitoring helps identify clogs or leaks that reduce performance. Additionally, sensor calibration guarantees your moisture sensors accurately detect soil conditions, preventing overwatering or underwatering. Walk through each zone during operation, looking for misaligned sprinkler heads or damaged drip emitters. This hands-on verification catches issues early, allowing you to make adjustments before they compromise your garden’s health or waste significant water amounts.
Frequently Asked Questions
Can I Water Multiple Zones Simultaneously, or Must They Operate Sequentially?
You can’t run all zones simultaneously—they must operate sequentially. I’d recommend this approach: simultaneous watering depletes your water pressure and GPM, while sequential operation protects zone overlap issues and guarantees adequate flow.
How Long Should Drip Irrigation Systems Run to Deliver Adequate Water Amounts?
I’d recommend running your drip duration for up to 4 hours to deliver adequate water amounts. Your emitter spacing and 1-gallon-per-hour output determine exact timing needed for proper soil saturation throughout your garden zones.
What Manual Button Durations Are Available for Testing Individual Zones?
I’ll help you picture water flowing precisely where you need it. When I test individual zones, I can cycle through durations ranging from one minute to eight hours, letting me verify each station’s performance before committing to full automation.
How Many Different Start Times Can I Program per Day?
You can program up to three different start times per day, though I’ve found that one typically suffices for most gardens. This maximum schedule capability gives you excellent start flexibility for varying watering needs.
What Rain Delay Options Exist for Skipping Watering Cycles During Wet Weather?
I’ve got you covered with rain delay options that’ll save the day. You can skip watering for 24, 48, or 72 hours. With sensor integration and seasonal adjustment capabilities, I’d recommend tailoring delays based on your climate’s needs.